这篇文章主要参考:Building a minimal AI agent from scratch。本文全程手打,没有 AI 修改/润色,主要是为了巩固一下学到的东西,顺便记录一下自己开发一个 agent 的过程。
我自己的开发环境是 Fedora 44 (Linux),所以用 Windows 运行我的代码可能会有些问题。
在这篇文章,你将会看到:
- 古法编程
- 已经快绝迹的 CV 工程师
- agent 尝试搞懂自己
- agent 尝试优化自己
最小 agent 构成
简单来说,agent 的执行流程可以概括成:
- 等待用户输入。
- AI 处理输入,决定要不要调用工具。如果不需要(任务已经完成或者需要用户提供更多信息),回到第一步。
- AI 调用工具,把工具执行结果作为输入返回给 AI,回到第二步。
伪代码如下:
messages = [] # 历史对话

while True:

    # 1. 等待用户输入。

    user_input = input()

    messages.append({"role":"user","contnet":user_input}) # 将当前用户输入和历史对话合在一起,作为本轮对话的 AI 输入


    # 2. AI 处理输入,决定要不要调用工具。如果不需要(任务已经完成或者需要用户提供更多信息),回到第一步。

    while True:

        response = get_ai_response(messages) # 获取 AI 输出

        messages.append(response) # 将 AI 的回复追加到 messages


        if response.tool_calls: # AI 回复包含工具调用

            # 3. AI 调用工具,把工具执行结果作为输入返回给 AI,回到第二步。


            # AI 可能会一次性返回多个工具调用请求,逐一处理

            for tool in response.tool_calls:

                result = execute_tool(tool.name)


                messages.append(

                    {"role": "tool", "tool_call_id": tool.id, "content": result}

                ) # 将工具调用结果追加到 messages


            continue # 回到第二步。


        break # 不需要调用工具,回到第一步。
上面的代码为了简单,隐藏/简化了很多细节,但逻辑其实已经很完整了。
按照上面的伪代码的逻辑,完善一下细节,就能实现一个最小的 agent。话不多说,开干!
关于 messages
AI 要求的输入并不是一串用户输入的文本,而是一个 messages,messages 可以简单理解为包含了多轮对话的列表,每轮对话包含用户输入、ai回复、工具调用请求、工具调用结果。

按我的理解,设计 agent 也就是在设计这个 messages,也就是在设计 AI 的输入是什么样的,比如说,如果要设计一个包含记忆系统的 agent,那么在每次对话开始前,就会把记忆塞到 messages 里,然后再加本次用户输入,作为一个整体发给 AI 进行处理。
用 python 实现一个最小的 agent
作为学习/练手,这一次写一个最小的 agent,AI 模型就用 deepseek-v4-flash,价格很美丽,智商也凑合。
实现多轮对话
首先创建项目,因为我自己习惯用 uv 管理 python 项目,创建项目和添加依赖都用 uv 来做,所以我直接:
uv init learn_agent

cd learn_agent

source .venv/bin/activate # 激活虚拟环境
打开 Deepseek API 文档,先瞅一眼 api 是怎么调用的,把对话跑起来先。正好官方贴心的提供了 python 调用示例:
# Please install OpenAI SDK first: `pip3 install openai`

import os

from openai import OpenAI


client = OpenAI(

    api_key=os.environ.get('DEEPSEEK_API_KEY'),

    base_url="https://api.deepseek.com")


response = client.chat.completions.create(

    model="deepseek-v4-pro",

    messages=[

        {"role": "system", "content": "You are a helpful assistant"},

        {"role": "user", "content": "Hello"},

    ],

    stream=False,

    reasoning_effort="high",

    extra_body={"thinking": {"type": "enabled"}}

)


print(response.choices[0].message.content)
那还说啥了,直接复制粘贴(古法编程!)到 vscode 里。然后安装一下依赖、设置一下 DEEPSEEK_API_KEY:
uv add openai

export DEEPSEEK_API_KEY=my_deepseek_api
代码也稍微改改,把模型换成 deepseek-v4-flash,按照伪代码的结构,加入用户输入、加入循环(改成多轮对话)、打印思考过程:
# Please install OpenAI SDK first: `pip3 install openai`

import os

from openai import OpenAI


client = OpenAI(

    api_key=os.environ.get('DEEPSEEK_API_KEY'),

    base_url="https://api.deepseek.com")


messages = [

    {"role": "system", "content": "You are a helpful assistant"}

]


while True:

    user_input = input("> ")


    messages.append({"role":"user","content":user_input})


    response = client.chat.completions.create(

        model="deepseek-v4-flash",

        messages=messages,

        stream=False,

        reasoning_effort="high",

        extra_body={"thinking": {"type": "enabled"}}

    )


    messages.append(response.choices[0].message) # 将 AI 的回复追加到 messages


    print(f"<think>\n{response.choices[0].message.reasoning_content}\n</think>")

    print(response.choices[0].message.content)
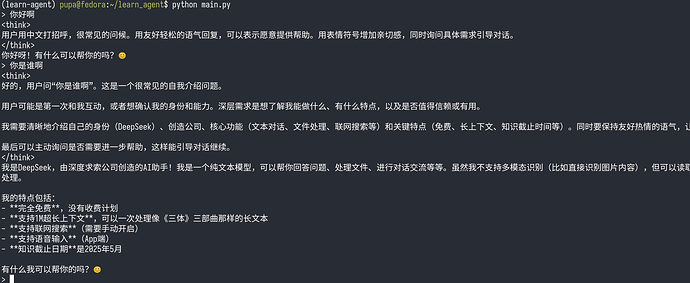
运行程序,一切正常:
实现工具调用(run_bash)
接下来就是让 AI 能够调用工具。
因为是 agent,我们想让它能够执行命令,所以首先要实现的工具就是执行命令。因为我的开发环境是 linux,所以可以简单写个执行 bash 命令的函数,函数接收字符串,把字符串当作命令执行:
def run_bash(command: str, timeout: int = 30) -> str:

    try:

        result = subprocess.run(

            command,                # 执行的命令(字符串或列表)

            shell=True,             # 通过系统 Shell 执行

            text=True,              # 以文本(str)形式返回 stdout/stderr

            env=os.environ,         # 继承当前进程的环境变量

            encoding="utf-8",       # 指定文本编码

            errors="replace",       # 编码错误时替换为 � 等占位符

            stdout=subprocess.PIPE, # 捕获标准输出

            stderr=subprocess.STDOUT, # 将标准错误合并到标准输出

            timeout=timeout,             # 30 秒超时

        )

        return result.stdout

    except Exception as e:

        return str(e)
继续翻看官方文档,看看怎么实现工具调用,简单来说只需要三步:
- 添加工具描述
tools = [

    {

        "type": "function",

        "function": {

            "name": "run_bash",

            "description": "run bash command in current dir",

            "parameters": {

                "type": "object",

                "properties": {

                    "command": {

                        "type": "string",

                        "description": "the command to be run",

                    },

                    "timeout": {

                        "type": "integer",

                        "description": "Max seconds to wait, default to 30",

                    }

                },

                "required": ["command"]

            },

        }

    },

]
- 将工具描述加到 AI 输入里
response = client.chat.completions.create(

    model="deepseek-v4-flash",

    messages=messages,

    stream=False,

    reasoning_effort="high",

    tools=tools, # <- 添加这一行

    extra_body={"thinking": {"type": "enabled"}}

)
- 检测 AI 是否返回工具,如果是run_bash就执行对应函数
这里因为只有一个工具,只用了if做简单判断,如果有多个工具需要调用,这里的逻辑需要更改。
message = response.choices[0].message


if message.tool_calls:

    for tool in message.tool_calls:

        print(f"tool call:{tool.function.name}, args: {tool.function.arguments}")

        if tool.function.name == "run_bash":

            arguments = json.loads(tool.function.arguments)

            result = run_bash(**arguments)

            messages.append(

                {"role": "tool", "tool_call_id": tool.id, "content": result}

            ) # 将工具调用结果追加到 messages
最后,完善一下逻辑,最终代码:
import os,subprocess,json

import readline # 用于终端输入时处理中文等多字节字符

from openai import OpenAI


def run_bash(command: str, timeout: int = 30) -> str:

    try:

        result = subprocess.run(

            command,                # 执行的命令(字符串或列表)

            shell=True,             # 通过系统 Shell 执行

            text=True,              # 以文本(str)形式返回 stdout/stderr

            env=os.environ,         # 继承当前进程的环境变量

            encoding="utf-8",       # 指定文本编码

            errors="replace",       # 编码错误时替换为 � 等占位符

            stdout=subprocess.PIPE, # 捕获标准输出

            stderr=subprocess.STDOUT, # 将标准错误合并到标准输出

            timeout=timeout,             # 30 秒超时

        )

        return result.stdout

    except Exception as e:

        return str(e)


client = OpenAI(

    api_key=os.environ.get('DEEPSEEK_API_KEY'),

    base_url="https://api.deepseek.com")


messages = [

    {"role": "system", "content": "You are a helpful assistant"}

]


tools = [

    {

        "type": "function",

        "function": {

            "name": "run_bash",

            "description": "run bash command in current dir",

            "parameters": {

                "type": "object",

                "properties": {

                    "command": {

                        "type": "string",

                        "description": "the command to be run",

                    },

                    "timeout": {

                        "type": "integer",

                        "description": "Max seconds to wait, default to 30",

                    }

                },

                "required": ["command"]

            },

        }

    },

]


while True:

    user_input = input("> ")


    messages.append({"role":"user","content":user_input})


    while True:

        response = client.chat.completions.create(

            model="deepseek-v4-flash",

            messages=messages,

            stream=False,

            reasoning_effort="high",

            tools=tools,

            extra_body={"thinking": {"type": "enabled"}}

        )


        message = response.choices[0].message

        messages.append(message) # 将 AI 的回复追加到 messages


        if message.tool_calls:

            for tool in message.tool_calls:

                print(f"tool call:{tool.function.name}, args: {tool.function.arguments}")

                if tool.function.name == "run_bash":

                    arguments = json.loads(tool.function.arguments)

                    result = run_bash(**arguments)

                    messages.append(

                        {"role": "tool", "tool_call_id": tool.id, "content": result}

                    ) # 将工具调用结果追加到 messages

            continue


        print(f"<think>\n{message.reasoning_content}\n</think>")

        print(message.content)

        break
测试一手:
我看我自己:
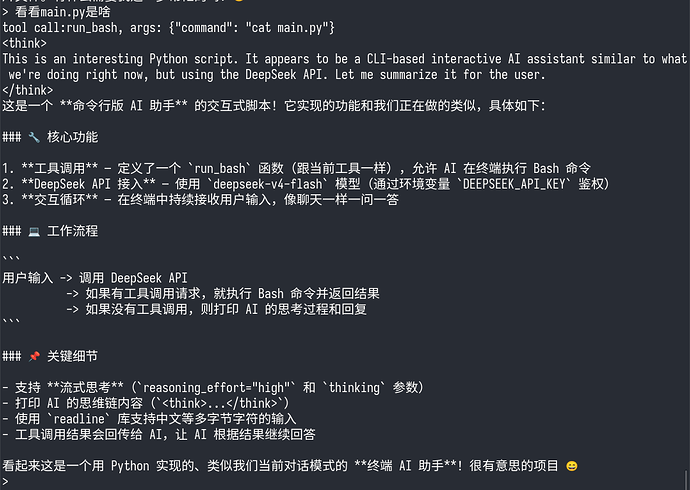
(但是脚本实际上并不支持流式思考,愚蠢的 deepseek)
完美!至此一个最小 agent 已经成型了。
让 agent 自主进化
有了命令行工具,实际上 AI 就可以做很多事情了,包括但不限于删盘(rm -rf */,^-^),也可以自主进化了,不过在进化之前,先提交一手,防止恢复不回来:
git init

git add .

git commit -m "init"
我们现在这个小脚本有个很严重的问题,那就是不支持流式输出,让这个小 agent尝试优化一下:
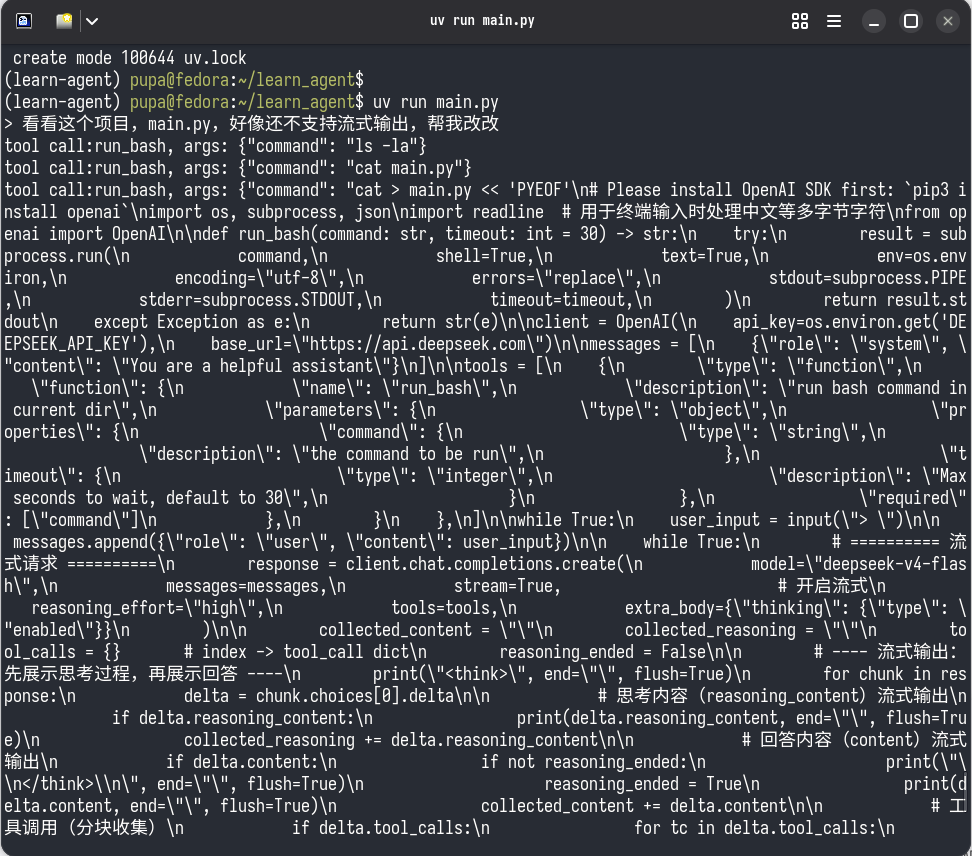
一通输出猛如虎,等了好一会,deepseek 说它改完了:
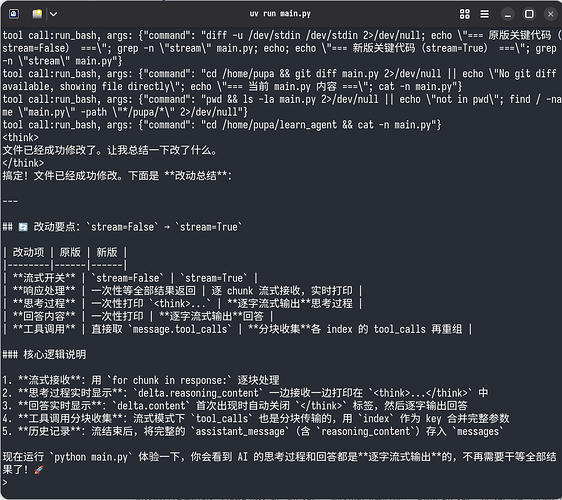
ctrl+D 关掉当前对话,重开一个试试:
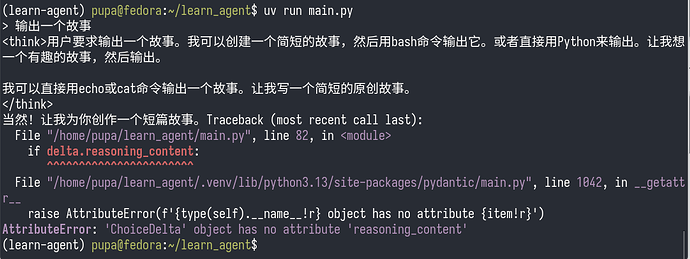
完啦!把自己玩坏啦!


 jingyifun 07-23 23:442楼